
Wondering how to use Power Automate or wondering what exactly it is? Power Automate is an incredible tool in the Microsoft Power Platform toolbox that can help your business automate tasks by creating low/no code flows, freeing up your team members’ time to work on challenges that require a human touch. Here are some valuable Power Automate best practices I have learned along the way that help me stay organized when constructing flows.
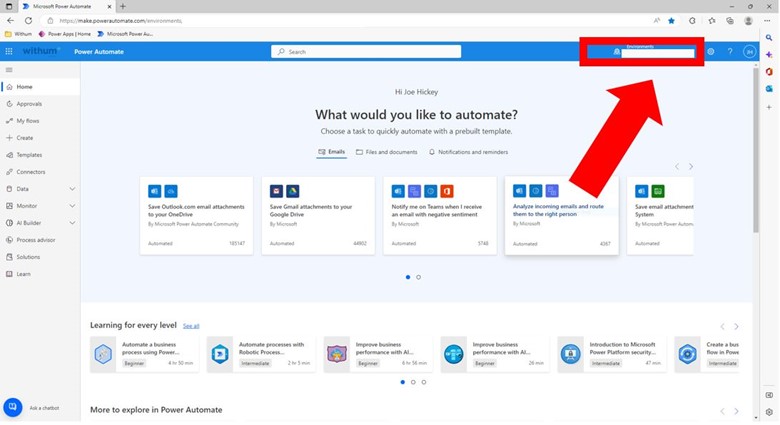
To begin, go to Power Automate and sign in using your Dynamics 365 credentials. Next, ensure that you are in the current environment displayed in the top right of the screen.
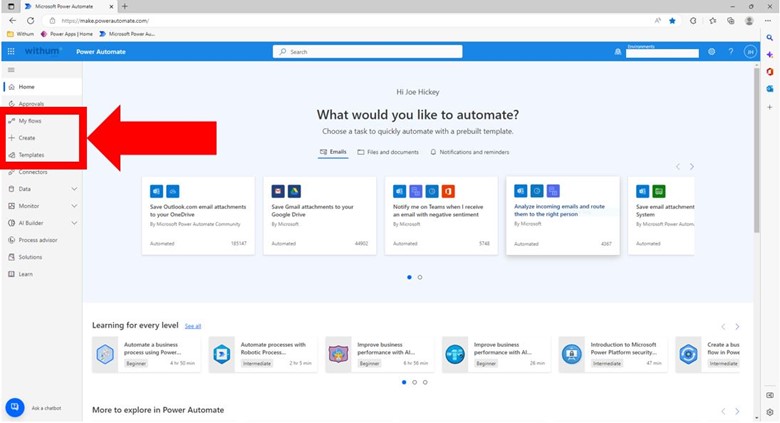
From this page, you have a few options on how you can begin creating a flow. You can select “create” and then choose what method of “trigger” you would like to serve as the base of the flow. These options include Automated, Instant and Scheduled cloud flows. You can also select Templates to browse through options you would like to use to create a flow with preexisting components instead of creating one from scratch. Finally, you can look at previously created flows under the “My Flows” tab for sharing, editing, etc.
Once you select your trigger, you can begin building your flow using the out-of-box content included with Power Automate. One important note to remember is that some of the action steps contain premium content, and further licensing is required to incorporate those steps into your flows. You can go to Microsoft Admin Center to ensure that you have the proper licensing and permissions to use certain connectors.
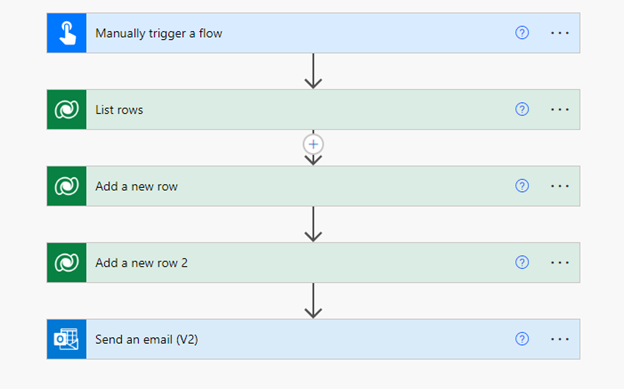
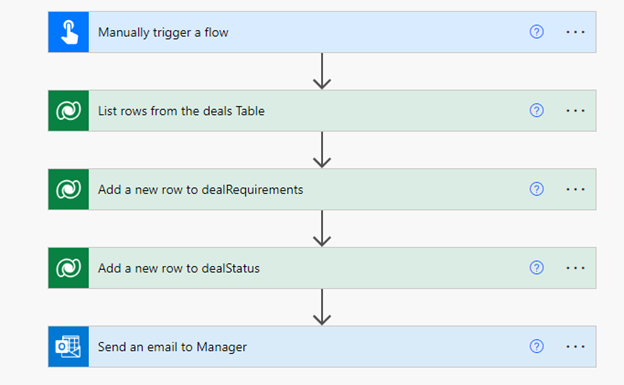
Each action step you add to the flow will appear as a little box accompanied by an arrow that shows how the step is evaluating the steps before it and applying the flow to the steps that come after. Each step comes with a default title that, if used multiple times, will increment with a number such as “List Rows -> “List Rows 2”. Not using a descriptive naming convention can get confusing for longer or more complex flows, especially if you are trying to elaborate on how a flow works for a client or someone who has never before worked with Power Automate. Here is an example of what a flow would look like without any customizations.
This flow could be more descriptive and provide a clearer understanding of what exactly the flow does. I’ve found it a best practice to name the steps according to what they do to allow developers to easily see what the flow is doing and when it is doing it. You can edit the names of the step by selecting the three dots on the right side of the action and selecting “rename”. For the naming schema, I personally use CamelCasing for an easy and consistent way to present the name and reduce potential errors that could occur from simple things such as spacing errors. You can also include notes with each step to further elaborate on what is going on with that step. You can select “add a note” directly beneath the option to rename the step, and it will place a comment within the step itself.
Just because I like to do it this way does not mean you have to. Find out which Power Automate best practices are the best fit for you and your team members!
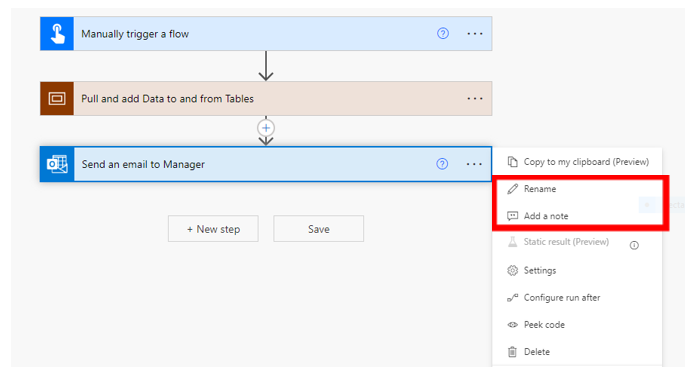
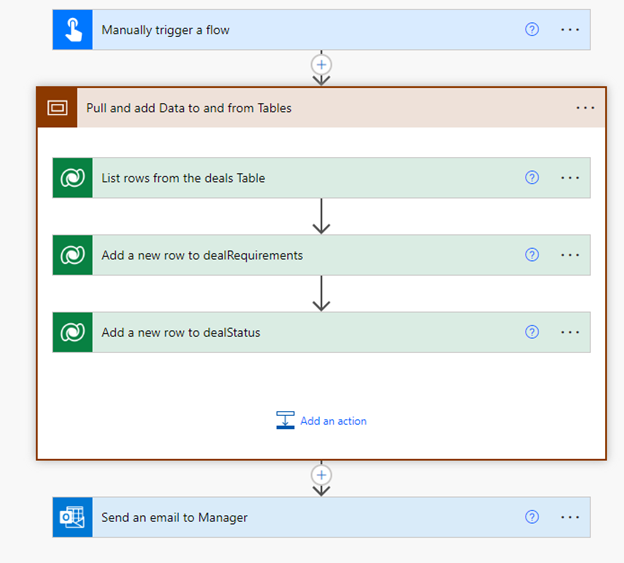
Here is an example of what an organized flow could look like for me.
Another simple yet useful tip when constructing a flow is to consider the length of the flow and if it will force you to scroll down the page, which can make editing tedious and annoying. Always remember most browsers have a native zoom feature (in the case of Microsoft Edge, it is CTRL and the plus or minus key for zooming in or out, respectively), allowing you to zoom out your screen to allow more visible steps on the screen.
A versatile action step that is incredibly helpful with both constructing and troubleshooting flows is the “compose” action. The “compose” action allows you to easily display the values being evaluated before or after other steps in the flow and can display just about all the types of data you would encounter in the construction process, making them a crucial tool. One more useful tool is the “scope” action. “Scope” allows you to take a series of actions and essentially group them together for further organization plus get a reduction in length. Using our previous example, we can put all three Dataverse steps within the scope, so when it collapses, we only have three actions displayed, giving it an overall cleaner and more organized feel.
Hopefully, this article helped you understand how to use Power Automate and gave you several useful tips to significantly increase your understanding and skills around creating flows. While some of these Power Automate best practices may seem obvious, it is easy to gloss over useful tools if you don’t know where to look. As with everything, you will only improve the more you practice and work to find what is best for you and your team.
Check out part 2 of this blog on 2023 Release Wave 1 and What’s New With Cloud Flows.
Author: Joe Hickey | [email protected]
Contact Us
Take the first step towards automating time-consuming tasks with Power Automate. Contact our Digital and Technology Transformation Services Team today and look forward to more free time for strategizing, team building and more.